Choosing and Fitting Narrowboat Windows
This information and more is also available at www.thefitoutpontoon.co.uk
New Build
You’ve chosen your shell, designed the layout, picked your engine and discussed all the other important items which go to make your new narrow boat unique whilst still retaining that traditional narrow boat feel.
Window Choice
So now it’s down to the important decision of how to obtain the optimum amount of daylight into your boat whilst retaining the best visual impact from the towpath. In other words, will you have all windows or all portholes or a mixture of windows and portholes?
How many windows/portholes, where should they be positioned, what size should they be?
A lot of the time it is down to the preference of the individual although in some cases what we want is not always practical so compromises have to be made, for example, a lovely brass porthole would look beautiful in the galley area, however, when the cooker is on, ventilation is essential so a sliding or removable window should then be the chosen option.
Window Options
Options for narrowboat windows are many and varied, the choice will be yours and difficult. Screw in frames with visible screws, screw in frames with hidden fixings (concealed behind a coloured insert) or clamp in frames, fixed to the cabin using internal clamps to pull the window tight to the cabin side leaving a smooth, unblemished exterior frame. Mitred tops with radius bottoms, mitred all round, radius all round, top hopper, hopper slider, arch top etc.
Standard Hopper style windows consist of a fixed bottom pane of glass and a smaller top glass which can be opened for ventillation as it sits back into side hoppers or onto specially designed window catches.
Full Slider windows consist of one fixed and one sliding pane of glass and are a good method of allowing ventilation within the galley area although in periods of wet weather they will need to be kept closed. Your manufacturer of choice will need to be advised of which side of the cabin you want the window installed because the fixed pane should be towards the front of the boat.
Slider/Hopper windows have an opening hopper at the top and the bottom section has one fixed and one sliding pane.
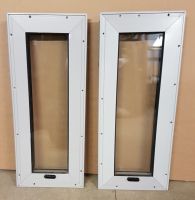
Fully Opening windows consists of a single pane of removable glass which when opened sit back into either side hoppers or special catches which not only act as locks but also when released, hold the glass in the open position. These windows have the added benefit of acting as an escape window in the event of an emergency. They are also extensively used in canal hire fleets but still look and operate well on private boats.
Then there is the Double Glazed option without a thermal break. All of the above, except sliding windows, are available as double glazed units which will retain heat, cut down on noise but will still attract condensation on the aluminium frame. These windows are installed with clamps and are very simple to fit.
If you really want to "push the boat out" and fit the ultimate in boat windows take a look at the New Thermally Broken Double Glazed Windows! The thermal break is located within the frame preventing both heat loss from within the boat and stopping cold transferring to the inner part of the aluminium frame. They do work as proven by feed back from warm, dry boaters!
Also, what finish would you prefer? Plain aluminium which will degrade over a period of time, bright or satin anodising or even powder coating which can be supplied in any colour in the chart and is easily colour matched if damaged by branches, feet or another vessel. Please note that Thermally Broken Double Glazed windows will only be supplied in Bright Silver anodised or any Powder Coated Colour.
Window positioning
If the narrow boat is to be supplied as a “sailaway” then the shell builder will want to know where to cut the apertures for the windows, the sizes, shapes and corner radii When designing the internal layout it is important to take into account the position of bulkheads and the thickness of the bulkhead material. It can be very easy to miscalculate and end up with a window or porthole aperture exactly in the middle of a where a bulkhead meets the cabin side!!
Window Sizing
Unless your boatbuilder is supplying the windows/portholes they will need to know the sizes of the apertures to cut in the cabin side. Window manufacturers often have their own dimensions which can vary by a couple of millimetres in the width and height and various radii, for example 75mm, 80mm and 100mm radii, therefore it is a good idea to ask the window manufacturer for templates.
When looking at window catalogues or websites be aware that the size shown ie: 36” x 21” is the aperture size cut in the cabin side and not the overall size of the frame.
Window Apertures
Many boatbuilders these days use laser cutters to make apertures in hulls and cabins, therefore hole sizes can be very precise. Advise your boatbuilder of your preferred window supplier and they will then check on the exact window sizes and allow a couple of extra mm on the hole dimensions to ensure a snug fit without forcing the window or porthole in. Trying to force windows and portholes into tight apertures will not only damage the frame but also cause it to distort and open up joints which can allow the ingress of water.
Window Fitting
Sealing windows into the cabin side has to be one of the most important jobs. Poorly fitted windows will allow water in and potentially ruin what should be a beautiful interior with water marks.
There are various options when it comes to choosing a suitable waterproof material to act as a gasket between the window frame and the cabin side: Silicone, Mastics such as Butyl or Arboseal and an adhesive closed cell foam tape.
All of these have their own benefits: Silicone comes in various forms , some which can be painted over and others which cannot, butyl which is used extensively within the caravan and motorhome manufacturing process, Arboseal, which is widely used within the building industry and is now also widely used by narrow boat builders because as the fastenings are tightened the Arboseal is compressed and fills any gaps especially if the cabin side is not perfectly flat.
Adhesive closed cell foam tape is becoming very popular particularly as one side is adhesive and the other side is a plain foam which, when compressed, forms a seal between frame and cabin side but has the benefit of allowing the window to be easily removed, whereas sealants can make the windows difficult to remove and all old sealant must be taken off and replaced prior to refitting. In many cases, the act of taking a window out will distort the frame which when put back, will not seal and looks unsightly.
Window Glass
Just when you thought you had finished with the options you will find that you will perhaps require opaque (Stypolite) glass for the bathroom and maybe even tinted glass for all the other windows.
Window Replacement
Window Removal
Taking old windows out, whether to replace with new or to allow for a paint job to be carried out on the cabin can be time consuming and difficult.
Windows may have been fitted using screws or rivets. In theory screws should have been stainless steel but in practice many windows are fitted with mild steel screws which will have corroded into the steel cabin side and will either break off or have seized solid. These screws and the rivets, will have to be drilled out before attempting to remove the window.
Once the fastenings have been dealt, with take a sharp knife and score around the joint between the frame and the cabin.
If the windows are to be refitted extra care will have to be taken with the next step.
Using a wide, thin blade, ie: a scraper, ease the blade between window frame and cabin side and as gently as possible, lever the frame outwards slightly before moving on doing small sections at a time all around the window, each time easing the window outwards until, eventually the frame is free from the cabin side. If the frame has been damaged at all during this process the window will be very difficult to reseal to the cabin side.
Replacing Windows
Ensure that the cabin side around the aperture has been prepared to take the window by cleaning off all the old paint, rust and corrosion and applying suitable primer, undercoat and topcoat to the paint manufacturers specification. All of the old adhesive must be removed from the back of the frame to leave a smooth face to allow the new sealant to form a watertight seal.
Apply your preferred seal to the rear face of the window frame and offer the window up to the aperture. Once the frame is in position use either stainless steel screws or aluminium rivets to fix the window in place, working your way around the frame in stages, tightening gently so that the window is not forced in and distorted.
If a sealant has been used it will be squeezed out and can be trimmed back after a day or two with a pointed piece of wood or very carefully, with a knife.
New for Old Windows
There are some very important considerations to be made when you decide to renew your windows.
- Note that the window sizes always relate to the size of the aperture in the cabin side.
- If your windows have any corners with a radius that your new windows will have the same radius.
- Check the spigot depth of the new windows to make sure that they fit directly to the existing lining. The spigot is the section of frame which fits through the cabin side and the measurement is taken from the back face of the window frame to the edge of the inner frame.
- Double glazed windows have a deeper spigot than single glazed windows and therefore adjustments will have to be made to the existing lining.
- If using new frames which are to be screwed in from the outside the fixing holes will not match up with the existing fixing holes. The old holes will have to be filled and new ones drilled.
To remove the old windows follow the steps above and prepare the surface of the cabin sides to receive the new windows.